How To Shoot The Northern Lights – An Amateur Guide
If you are here, then it is most likely that you are traveling to some places where you can see the Aurora Borealis… commonly known as the northern lights. Or in some cases, Aurora Australis – The Southern lights.
If you are already a professional photographer, then you probably can’t learn anything from this post because…. well, you already know how to shoot the northern lights better than I do. lol. First, I don’t own a professional camera, no special lens or other special filters. All I had with me, is a borrowed DSLR camera that I got from my elder brother and have been playing around during the duration of my trip to Finnish Lapland and more recently, Iceland.
So.. if you are ready to learn how to shoot the northern lights using an amateur camera, here’s my extremely amateurish guide:
First, in order to properly shoot the northern lights, I recommend that you get a camera stand, a tripod if you will so that you don’t get any shaky hand movements. This is importantly because you will be shooting the northern lights at night.
Second, your chances of spotting the northern lights will be higher if you are traveling during the northern lights season. As a rough guide, the season usually starts from September to April.
While the range if pretty vast, do note that the different months does provide different advantages. For example, deep into January and February, the nights are longer gives you a much better chance of spotting the lights (I have seen high northern lights activity as early as 5pm. If it’s in early September, the sky would be too bright to spot one whereas in January, the sky would have already been dark). Then again, September weather is slightly better as it’s not ridiculously cold as compared to winter months in January or March…)
Third, though I do not possess enough data to prove this yet, the best time to see the northern lights would be between 10pm to 2pm. For both times that I saw the northern lights, it was between 2200hrs – 0000hrs.
The fourth thing that you must note is that the sky needs to be clear… and dark, preferably free from any light pollution or clouds or snow or rain for that matter. In other words, it is recommended that you do not stick to the city like Helsinki (Finland) or Reykjavik (Iceland) but venture out into somewhere clear from the city lights. If it is snowing or cloudy, you can forget about spotting the lights.
Fifth, you can check for the activities of the northern lights to increase your chance of spotting one instead of running out and checking the dark skies every now and then. Here are some of the sites that are very useful for tracking aurora activities depending on which country you are trying to spot the lights.
Aurora Forecast (North America)
UAF Geographic Institute Alaska
Now that we have established the best chances for you to spot the aurora, now, lets go into the details of how to shoot the northern lights with your DLSR camera.
In order to shoot the northern lights, you have to set your settings to manual. Yes, make sure you set it to manual mode instead of auto focus. This is IMPORTANT. Manual, Manual Manual…. I can’t stress that enough… yea… It’s because the first time I tried doing it in auto… I couldn’t get any nice shot as the camera didn’t know what to focus on.. and thus, did not capture the shot nicely. So.. Manual.. please please please.. lol.
Second, adjust your camera timer to 2 seconds. Or if you are professional enough, a remote trigger will also help do this trick. This is again, to prevent any sudden hand movement when taking the shots so that you get some really crisp, clear shot at the northern lights.
Third, make sure you have an extra battery or some ways to keep your camera protected from the harsh cold temperature. Yes, your battery can deplete pretty quickly in the cold temperature and it would be a pity when you saw a nice shot go to waste when your battery actually runs out.
The last point that I will be touching on is your camera settings.
All in all, it’s all about balance. There are 3 main things you wanna play around with, The Aperture, Shutter Speed and ISO. So, you need to test and see which is the best fit for your picture. Adjust accordingly to what was capture.
Here is my default setting which you can start off and adjust once you get your first set of data:
1) Aperture – f/4
2) Exposure – 15 seconds
3) ISO – 800
Here are some of the results based off the data:
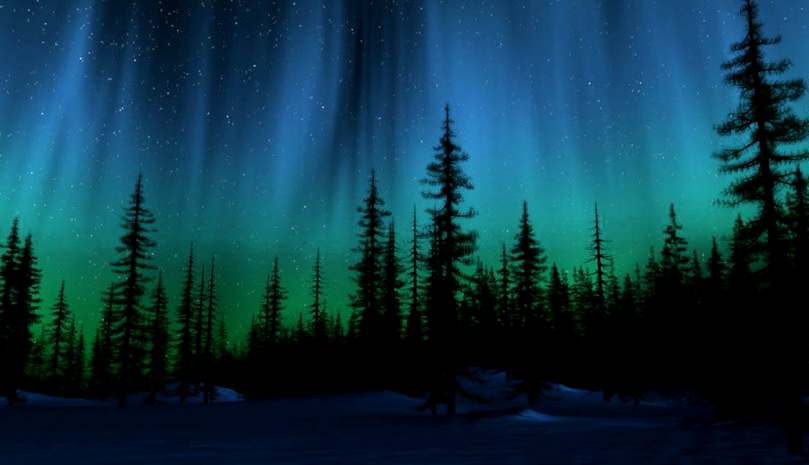
 (Setting Data: f/4 | 20 Sec | ISO 800)
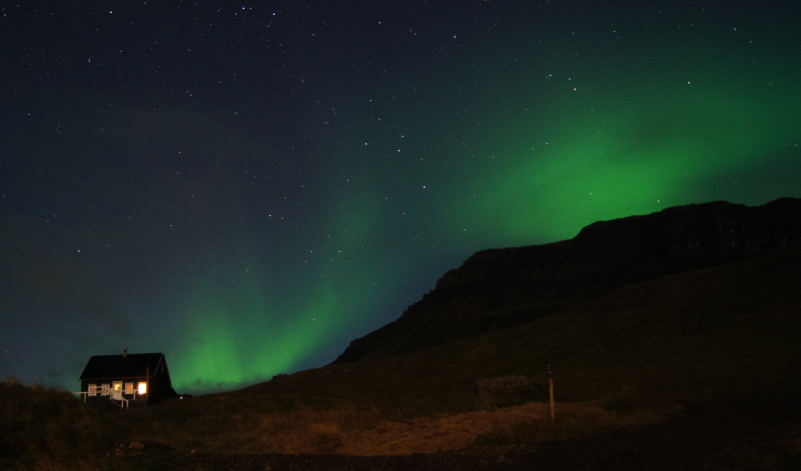
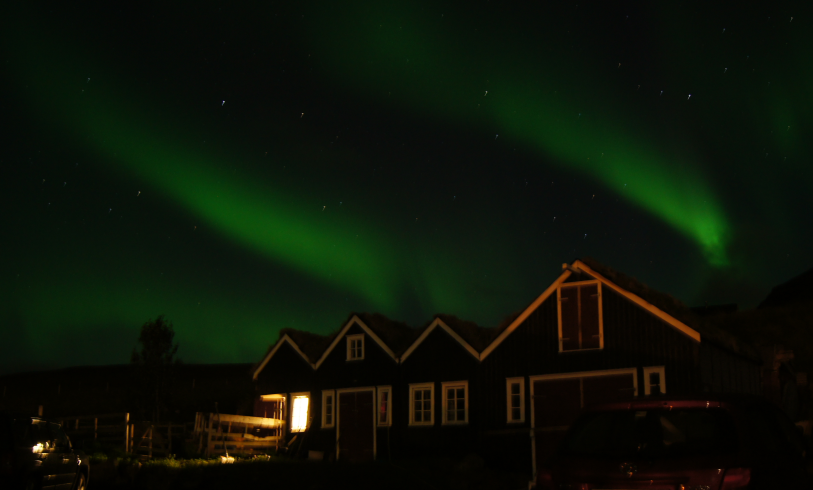
 (Setting Data: f/4 | 20 Sec | ISO 1600)
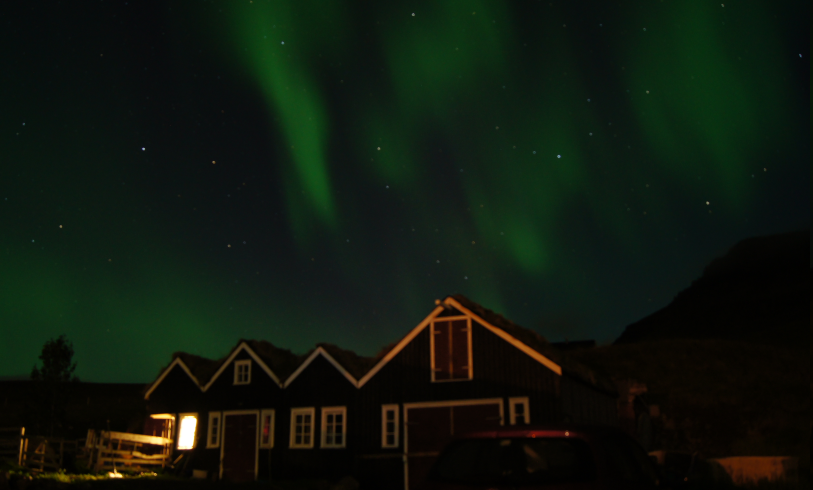
As you can see, just changing a single setting can have a different effect on the picture itself.
Let’s look at another set of data from the shots that I have taken:
 (Setting Data: f/4 | 13 Sec | ISO 400)
 (Setting Data: f/4 | 20 Sec | ISO 400)
Everything remaining equal, just a change in exposure time gave me a clearer detail of the northern lights – you can see a better “line” of the light if you compare the 2 picture.
So, don’t be afraid to play around and test with your capture settings. If you are relatively new, try using the default setting I mentioned above to get your first set of data, then adjust your setting to make your picture better.
[Pro Tip: Use an object like a tree, house, mountain, building silhouette to compliment your northern light shots. It’ll help you capture a better shot of your aurora borealis]